
Have an idea for an image? Don’t want to wait for someone to make it? This post is aimed at helping those get started with generating images that are like the ones on this account.
There are a lot of resources out there for generating images, both locally and online. A quick search will likely yield results featuring many of the online generators out there including DA’s own dreamup!. In this case, we’ll be looking at generating ai images locally. Why locally? Even though it’s easier to use an online generator, I prefer the control you get over using a local solution. Often times, online generators limit the options available. That being said, if an online generator will produce what you want, go for it! This is all preference.
I’ll go over my process for generating images, but know that there are a ton of guides for local generation. In fact, many of the things I’ve picked up on have been from those guides. YouTube has a lot of great guides if you prefer a visual approach.
Table Of Contents
Getting Started
I recommend going over this guide in order to follow along: https://stable-diffusion-art.com/beginners-guide/ (SDA guide)
It’ll provide a lot of the base information for getting started, including how to install the tools you need. The key thing to note is the GPU. This is essential to generating ai images. The amount of VRAM needed depends on what model you are using. Some might only need 6GB while others require 24GB. The models I use might require between 6 and 8. But having more will increase efficiency. (If you don’t meet the requirements, you can check out the cloud section: Running on cloud)
I’m using Forge, which is a derivative of Auto1111, as well as ComfyUI. The SDA guide will go over the pros and cons of some of the tools, which you can use to determine what tool you want. For this post, I’m going over Forge.
Once you have everything setup, you’ll be able to start generating ai images. But how do you generate the kind of images I have on this DA account? I’ll go over that in the process section.
Process
From here on out, I’ll go over how I generate ai images for this account. Depending on your setup, it might not match up (especially if using ComfyUI). But there are minimal “extras” that are used for generating the images here. The model itself is usually enough, along with the prompt.
There are many custom models that come from the base model (Stable Diffusion in this case). A very popular one is Pony. This has been mainly used for anime images but it has been used for realistic images as well. Pony has led to many derivatives and even “base” models themselves, which also have many derivatives. The models I’ve been using are derivatives of a model called Illustrious.
Where can you get these models? Following the SDA guide, you’ll notice there are 4 parts. One of them talks about the different models out there and where to get them. In my case, I get most of the models from Civitai.
I use a few models for this page like Nova Anime and WAI (which I denote with a code in the title), and the one I’ll use to demonstrate will be Hassaku XL (Illustrious).
Searching for it on CivitAI will lead to the model (which has a bunch of versions). In this case I’m using V1.0

Simply click the download button to get it. Note that the size is 6.46 GB. That’s how much VRAM will be required to use it (which will be an 8GB card). This is the typical size for Stable Diffusion XL models (SDXL). If you have a smaller card, then you could use Pony derivatives that are based on Stable Diffusion 1.5 (which is usually around 2GB). In fact, there is an Hassaku version based on SD1.5. There are limitations, such as resolutions that can be used.
Once you’ve downloaded the model, just simply add it to the correct folder. This usually goes in a models folder, but the SDA guide goes over it in more detail.
Running Forge
With Forge open, you’ll see many options. I don’t use most of them and simply work on the prompt.
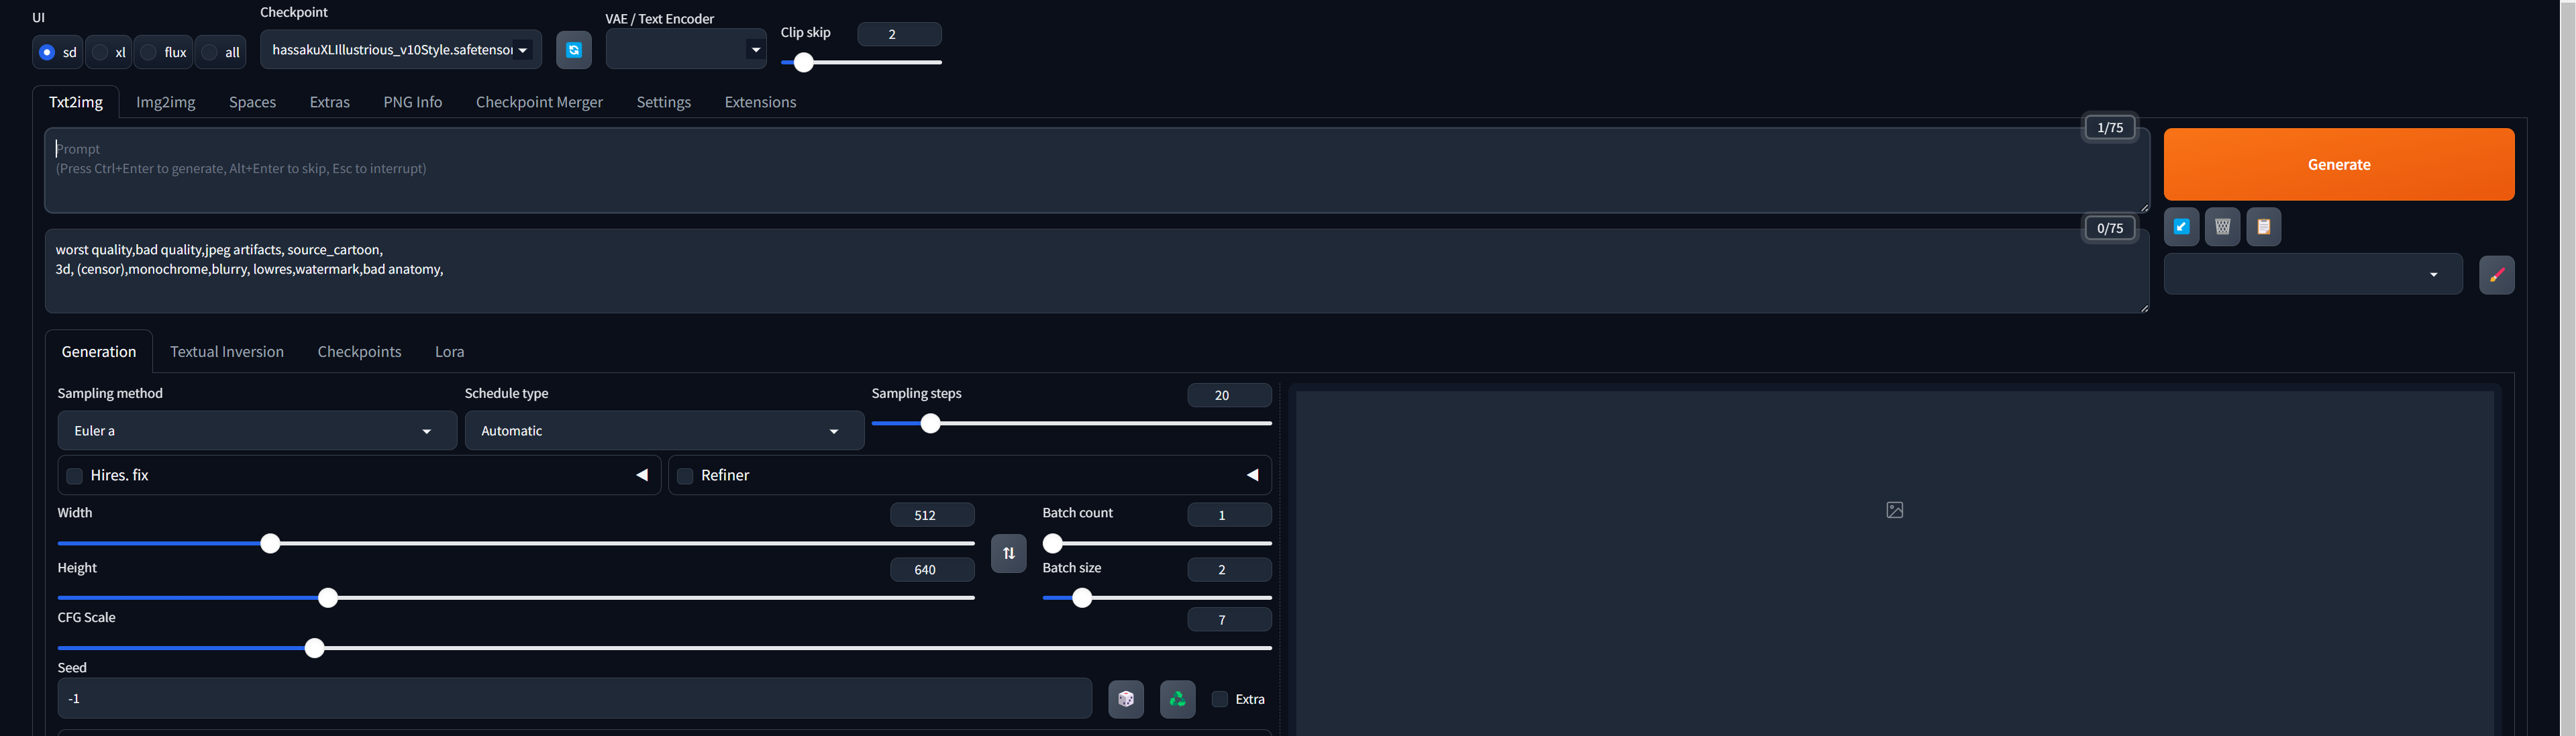
My basic settings that I use are the following:
Sampling Method: Euler A
Schedule Type: Automatic
Sampling Steps: 25
CFG Scale: 4-5
Everything else can be left at default. The checkpoint should be the model you’ve chosen (Hassaku in our case).The other settings you might want to change is the width and height. Since the models are based on SDXL, these are the recommended resolutions:
- 1152 x 896
- 1024 x 1024
- 896 x 1152
- 1216 x 832
- 832 x 1216
- 1344 x 768
- 768 x 1344
- 1536 x 640
- 640 x 1536
The one I use most often is 832 x 1216 which is more of a portrait size.
Once that is all setup, I work on the prompt.

Prompting in Pony/Illustrious makes extensive use of tags, commonly referred to as danbooru tags. You can search for articles on Civitai for more information on danbooru tags. The prompts that are in the deviations on this account are examples of prompts using danbooru tags.
I recommend using the tagcomplete extension: https://github.com/DominikDoom/a1111-sd-webui-tagcomplete
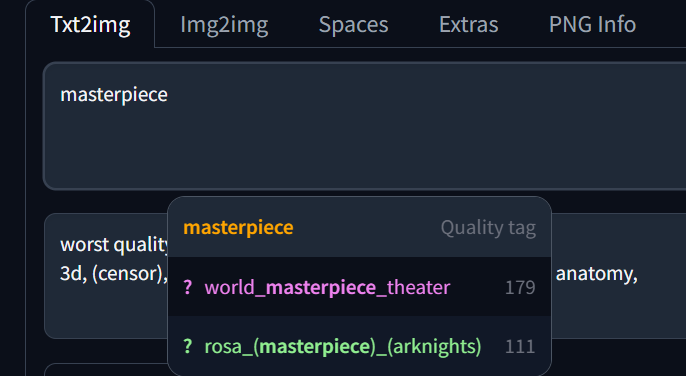
This will provide tags that match your input and can also link you to information on what a tag will do (Clicking the ? mark will link to the information). The main source of information on danbooru tags, is the danbooru website itself.
The easiest thing to do would be using the prompts from some of the images you like here.
You can also find prompts from images on the Civitai site as well as other sites such as prompthero and some subreddits.
To begin, you usually start with quality tags. These are used to improve (as the name suggests) the quality of the images generated. The ones I typically use are “masterpiece,best quality,amazing quality,very aesthetic,absurdres,newest”

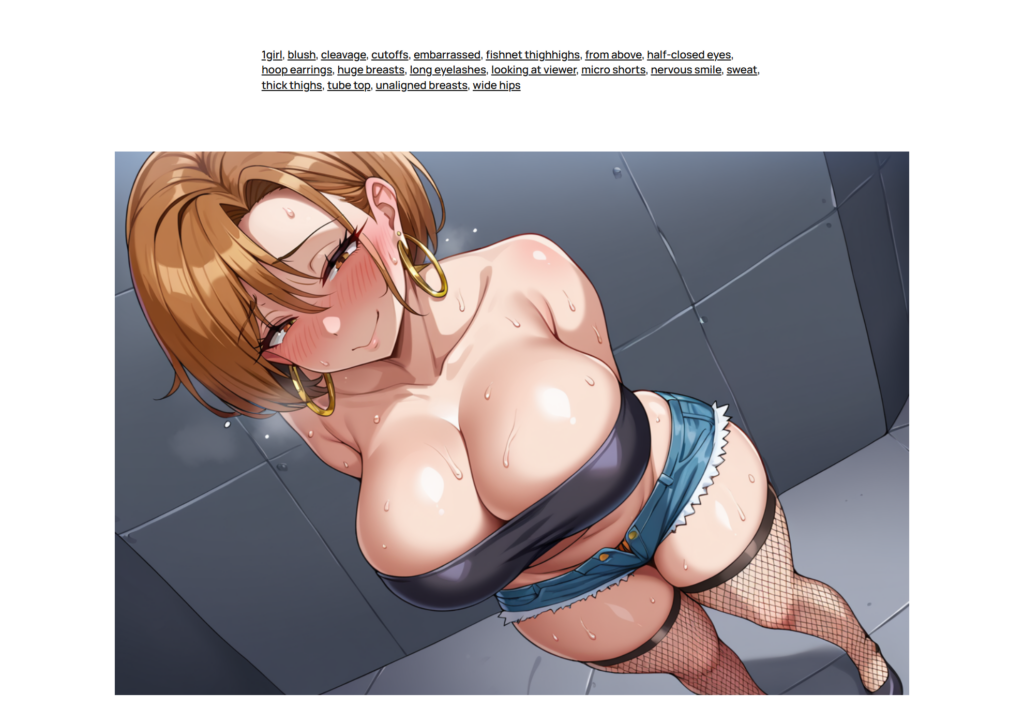
After take the prompt from the image and add it in.

If you simply want to generate as close to the image as you can, this is enough. But if you want to change things by adding, removing, and/or modifying tags, then go for it! You can make it closer to your idea.
The original image features a woman with blonde hair, wearing fishnets. Let’s simply make it black hair and regular thighhighs (not fishnets). Note that blonde hair isn’t in the original prompt. Since I didn’t specify a hair color originally, it was randomly generated. In this case, we’ll be specific.

This time I took out fishnet and added black hair.
Once you have the prompt set, just click generate and you’re finished!

I’ll be going back to this post occasionally to add or clarify information. If something is not working, post a comment and I’ll see if I can help.
Have fun!
Running on cloud
But wait! I don’t have a computer that can run this, what can I do?
Like many others, I found myself limited by hardware requirements needed to run Stable Diffusion. Though I’m capable of generating images, there are some models that I’m not able to use. So I tried out a different solution that doesn’t require me to have a high end GPU card, the cloud.
There are different cloud options available, some even specific to Stable Diffusion such as RunDiffusion (https://rundiffusion.com/). One of the first ones I tried was an EC2 instance on AWS. This worked well but the biggest hurdle was the cost. It is significantly more expensive than some of the other options out there, but it allowed for more customization and allowed me to set things up the way I wanted to. Aside from the cost, you need to be approved before you are allowed to use certain GPU instances, which can take a while. If you already have access, than you can take advantage of the offerings from AWS. This tutorial is helpful for setting things up for the first time: https://stable-diffusion-art.com/aws-ec2/
I cam across Vast and saw that there were already options for running Stable Diffusion. The cost was significantly lower than AWS and there was no need to get approved in order to use some of the high end GPUs. I was even able to run an A100 with 80GB of ram, though it was still pretty pricey but close to what I would have paid with AWS for something significantly less powerful.
Vast
You can check out the site here: https://cloud.vast.ai/?ref_id=140789 (Note: This is a referral link which helps me out). Right away you can see the available instances and their cost. I typically go for the 3090/4090 as it suits me well enough but if you want to do things like video or even training it’s definitely beneficial to use GPUs like the A40 and A100.
Setting this up is very straight forward and there is even a guide on it – https://vast.ai/docs/use-cases/stable-diffusion. The one thing to keep in mind is the storage. If you use a lot of checkpoints and LoRAs, it can take a while to download and install all of it which would increase the running time. It’s recommended to use an external storage provider such as Google Drive which Vast supports. Using the integration, you can move over all your files to any instances that you create even if it is not running. If you’re only using a few things, it shouldn’t take too long to download and install on a new instance.
When you’re finished using the instance, it’s recommended that you delete it. You can stop and leave it for another time, but you would have to pay for the storage (which depends on how much you have). This is another reason why it would help to use something like Google Drive.
Pricing
The cost will depend on what you choose but typically for something like the 4090, it could be around $0.30/hour(as of the time of this writing). There is an option to use an interruptible instance which is similar to spot instances in AWS. An interruptible instance is cheaper than a regular on-demand instance but they can be “interrupted” at any time meaning that you would suddenly lose connection and access to the instance. I don’t use instances for too long, so this hasn’t really happened but if you require constant access, then the on-demand instance would be better.
The highest prices would be around $3/hour for using something like the H100 which offers 80GB of RAM and is often used for training. If you’re simply generating images, you wouldn’t need anything close to that but an interruptible instance could be available for you to use at a significantly cheaper price.
Alternatives(?)
There are other options that have an even easier setup like RunDiffusion, though the pricing is higher. Things like Runpod and Paperspace have been mentioned when I was looking things up but I haven’t used them myself.
If you come across any other solutions that have worked out well for you, feel free to share!
If you do end up using Vast, let me know how it works out. I do recognize there might be shortcomings to the service (such as the instance you want not being available) but for the most part it’s worked out.
And if you end up using the referral link I posted, thanks so much! It helps with the cost of running instances myself. If you don’t want to bother with it, that’s fine too. As long as it ends up working for you, that’s the main goal!
Resources
- https://stable-diffusion-art.com/beginners-guide/ (Start with this! Contains a lot of detailed information if you are just getting started).
- https://github.com/lllyasviel/stable-diffusion-webui-forge (The GUI I used for this post. The SDA guide also goes over this).
- https://github.com/DominikDoom/a1111-sd-webui-tagcomplete (A helpful extension for using danbooru tags).
- https://civitai.com/models/140272?modelVersionId=1103588 (The Hassaku model used for this post. You can also find the other models I’ve used through this site, such as Nova Anime and WAI).